|
|
由于开发板支持python开发,就想着使用python完成应用产品的开发,免去了交叉编译以及编写makefile的步骤,何乐而不为呢。。。
下面以建立tcp服务器,udp通信先进行说明,由于串口需要使用serial包,故而需要进行安装,安装教程见【米尔瑞萨RZ/G2L开发板-创新应用】+ 安装pip3和第三方Python库 - 米尔RZ/G2L开发板 - 米尔科技论坛 - Powered by Discuz! (myir-tech.com)
tcp服务器的建立
- # -*- coding: utf-8 -*-
- import socket # 导入socket模块
- import threading
- # server 接收端
- class tcp(threading.Thread):
- def __init__(self, ip: str = '', port: int = 9000):
- threading.Thread.__init__(self)
- self.ip = ip
- self.port = port
- def run(self):
- # 创建socket
- tcp_server_socket = socket.socket(socket.AF_INET, socket.SOCK_STREAM)
- # 本地信息
- address = (self.ip, self.port)
- # 绑定
- tcp_server_socket.bind(address)
- tcp_server_socket.listen(128)
- while True:
- # 等待新的客户端连接
- client_socket, clientAddr = tcp_server_socket.accept()
- while True:
- # 接收对方发送过来的数据
- recv_data = client_socket.recv(1024) # 接收1024个字节
- if recv_data:
- print('接收到的数据为:', recv_data.decode('gbk'))
- client_socket.sendto(recv_data, clientAddr)
- else:
- break
- client_socket.close()
- tcp_server_socket.close()
- # -*- coding: utf-8 -*-
- import socket # 导入socket模块
- import time # 导入time模块
- import threading
- # server 接收端
- global cfg
- class udp(threading.Thread):
- def __init__(self, ip: str = '', port: int = 9000):
- threading.Thread.__init__(self)
- self.ip = ip
- self.port = port
- def run(self):
- # 创建一个套接字socket对象,用于进行通讯
- # socket.AF_INET 指明使用INET地址集,进行网间通讯
- # socket.SOCK_DGRAM 指明使用数据协议,即使用传输层的udp协议
- server_socket = socket.socket(socket.AF_INET, socket.SOCK_DGRAM)
- # 接收来自任何IP的广播帧
- address = (self.ip, self.port)
- server_socket.bind(address) # 为服务器绑定一个固定的地址,ip和端口
- # server_socket.settimeout(10) # 设置一个时间提示,如果10秒钟没接到数据进行提示
- while True:
- # 正常情况下接收数据并且显示,如果10秒钟没有接收数据进行提示(打印 'time out')
- # 当然可以不要这个提示,那样的话把'try:' 以及 'except'后的语句删掉就可以了
- try:
- now = time.time() # 获取当前时间
- # 接收客户端传来的数据 recvfrom接收客户端的数据,默认是阻塞的,直到有客户端传来数据
- # recvfrom 参数的意义,表示最大能接收多少数据,单位是字节
- # recvfrom返回值说明
- # receive_data表示接受到的传来的数据,是bytes类型
- # client 表示传来数据的客户端的身份信息,客户端的ip和端口,元组
- receive_data, client = server_socket.recvfrom(1024)
- print(time.strftime('%Y-%m-%d %H:%M:%S',
- time.localtime(now))) # 以指定格式显示时间
- print('来自客户端%s,发送的%s\n' % (client, receive_data)) # 打印接收的内容
- server_socket.sendto(receive_data, client)
- except socket.timeout: # 如果10秒钟没有接收数据进行提示(打印 'time out')
- print('time out')
- import time
- import serial
- import threading
- class sci(threading.Thread):
- def __init__(self, port: str = '/dev/ttySC3', baudrate: int = 115200,parity:str = serial.PARITY_NONE):
- threading.Thread.__init__(self)
- self.port = port
- self.baudrate = baudrate
- self.parity = parity
- self.serial_port = serial.Serial(
- port = self.port,
- baudrate = self.baudrate,
- bytesize = serial.EIGHTBITS,
- parity = self.parity,
- stopbits = serial.STOPBITS_ONE
- )
- def run(self):
- if not self.serial_port.is_open:
- self.serial_port.open()
- time.sleep(1)
- # Send a simple header
- try:
- while True:
- if self.serial_port.in_waiting > 0:
- data = self.serial_port.read_all()
- self.serial_port.write(data)
- time.sleep(1)
- except KeyboardInterrupt as exception:
- print("Exiting Program")
- print(exception.args)
- except Exception as exception_error:
- print("Error occurred. Exiting Program")
- print("Error: " + str(exception_error))
- print(exception_error.args)
- pass
- finally:
- self.serial_port.close()
- pass
-
为了进行后期扩展,所以将各模块分别建立为class,需要建立main函数进行初始化
- # -*- coding: utf-8 -*-
- from udp import *
- from tcp import *
- from sci import *
- from threading import Thread
- if __name__ == "__main__":
- # 创建 Thread 实例
- t1 = udp('', 9000)
- t1.start()
- tcp_thread = []
- serial_thread = []
- for x in range(1):
- tcp_thread.append(tcp('', 5000))
- serial_thread.append(
- sci(port='/dev/ttySC3', baudrate=115200), parity= serial.PARITY_NONE)
- # 启动线程运行
- for x in range(1):
- tcp_thread[x].start()
- serial_thread[x].start()
- # 等待所有线程执行完毕
- t1.join() # join() 等待线程终止,要不然一直挂起
- for x in range(1):
- tcp_thread[x].join()
- serial_thread[x].join()
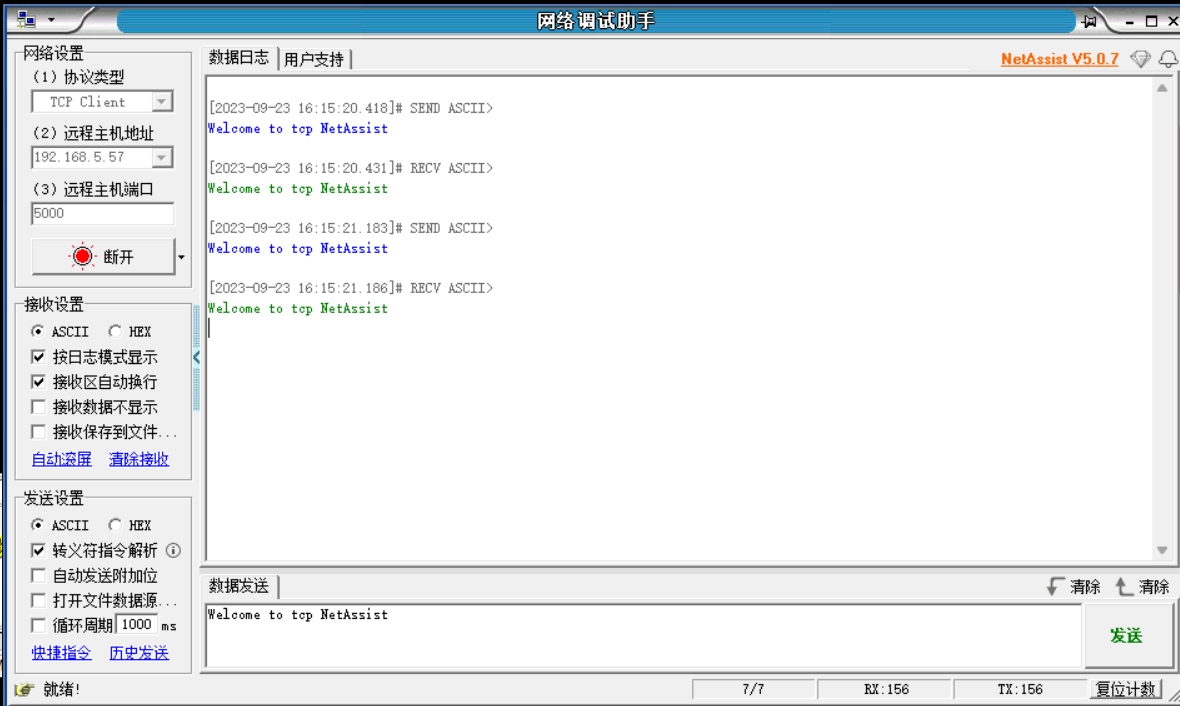
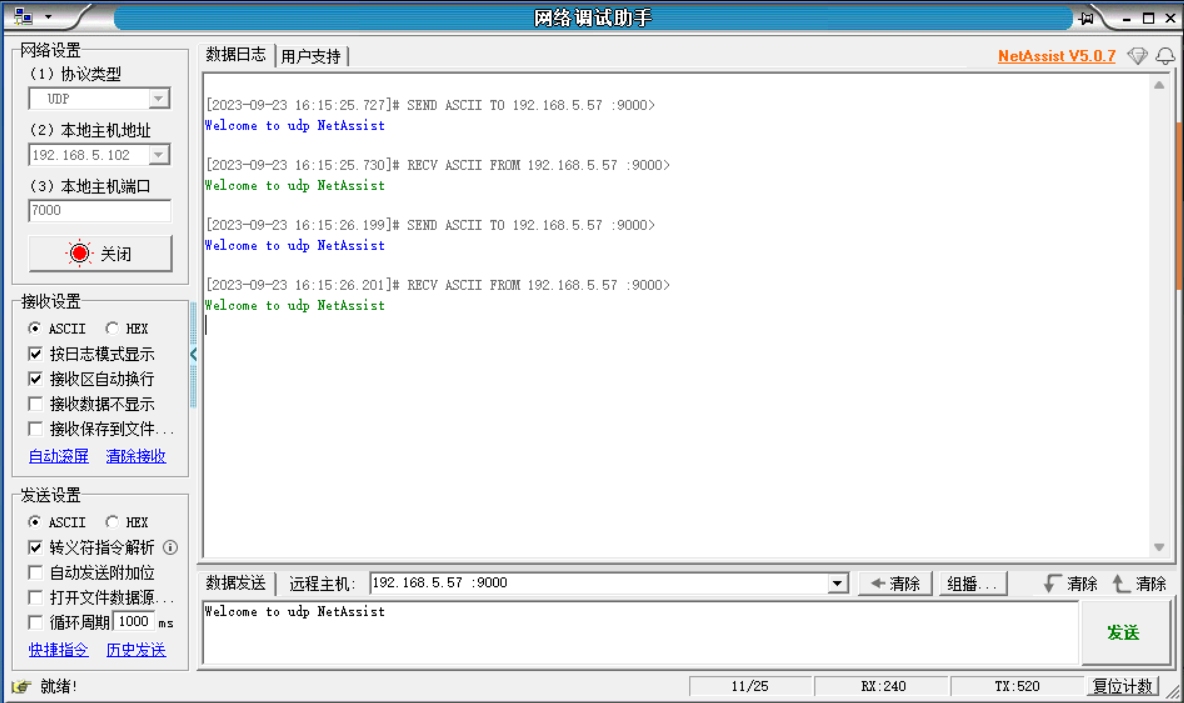
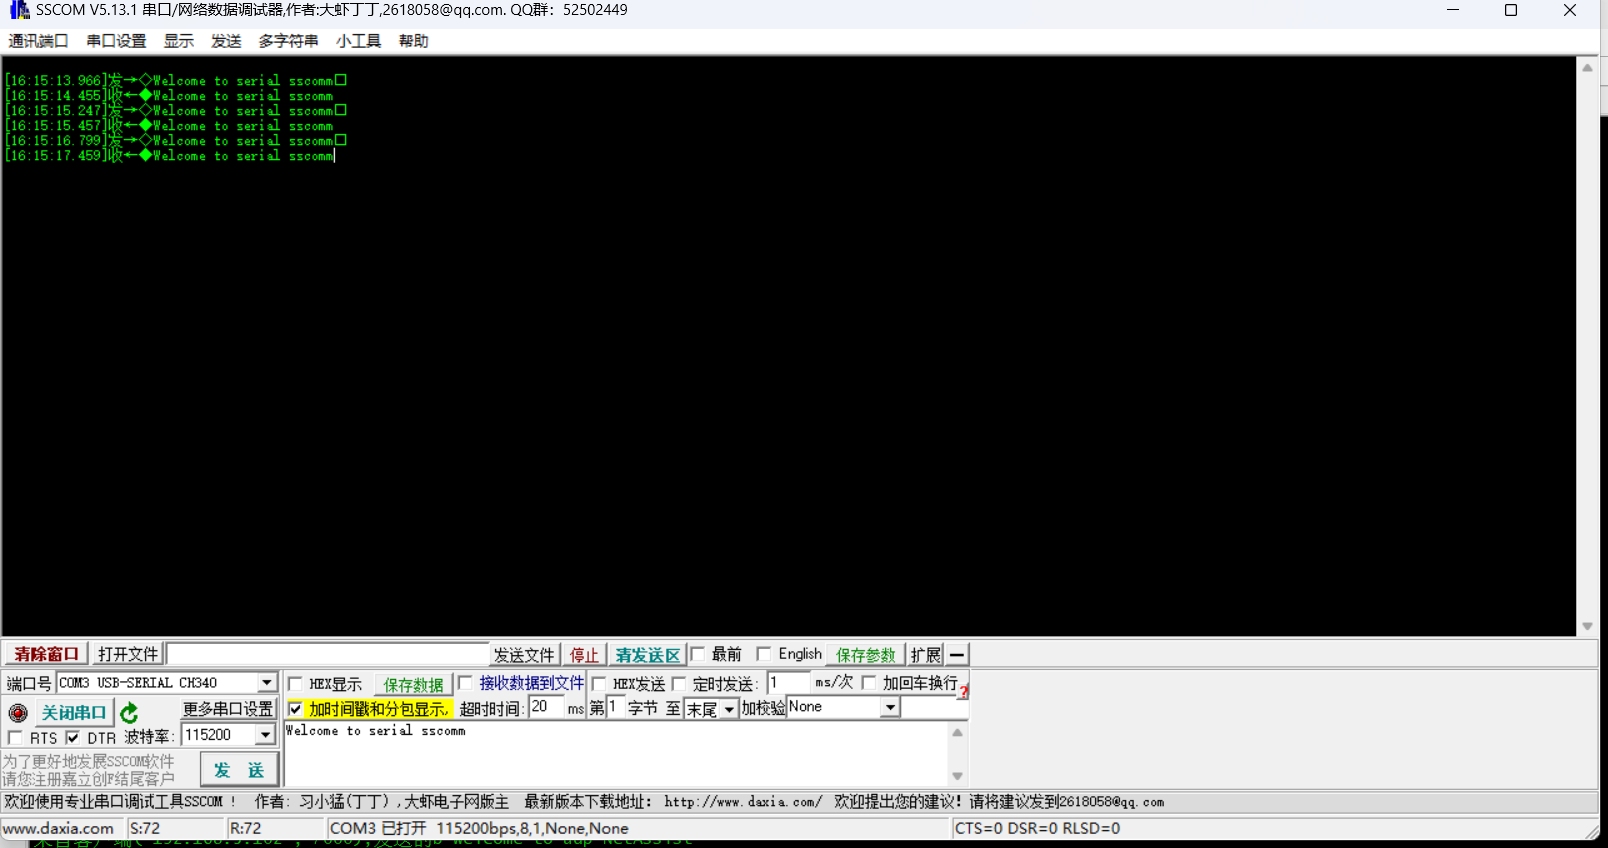
运行后下图分别为使用windows测试工具进行测试
tcp通信测试

udp通信测试

串口通信测试

最后告诉一声测试的小伙伴,使用的串口为 /dev/ttySC3,对应的硬件为调试口下方的串口哦,千万别接错了
|
|